Make a Christmas Ball Powered by Go (TinyGo)
Christmas is a time of joy and celebration, and what better way to add some fun to your holiday decorations than with a DIY Christmas ball that runs Go? This is possible thanks to TinyGo, which is a project to bring the Go programming language to microcontrollers and modern web browsers by creating a new compiler based on LLVM. Our DIY Xmas ball uses the Xiao RP2040 and a MAX7219 dot LED matrix to create a dazzling display that will impress your friends and family.
To make your own TinyGo Christmas ball, you will need the following materials:
- TinyGo installed (check install guide)
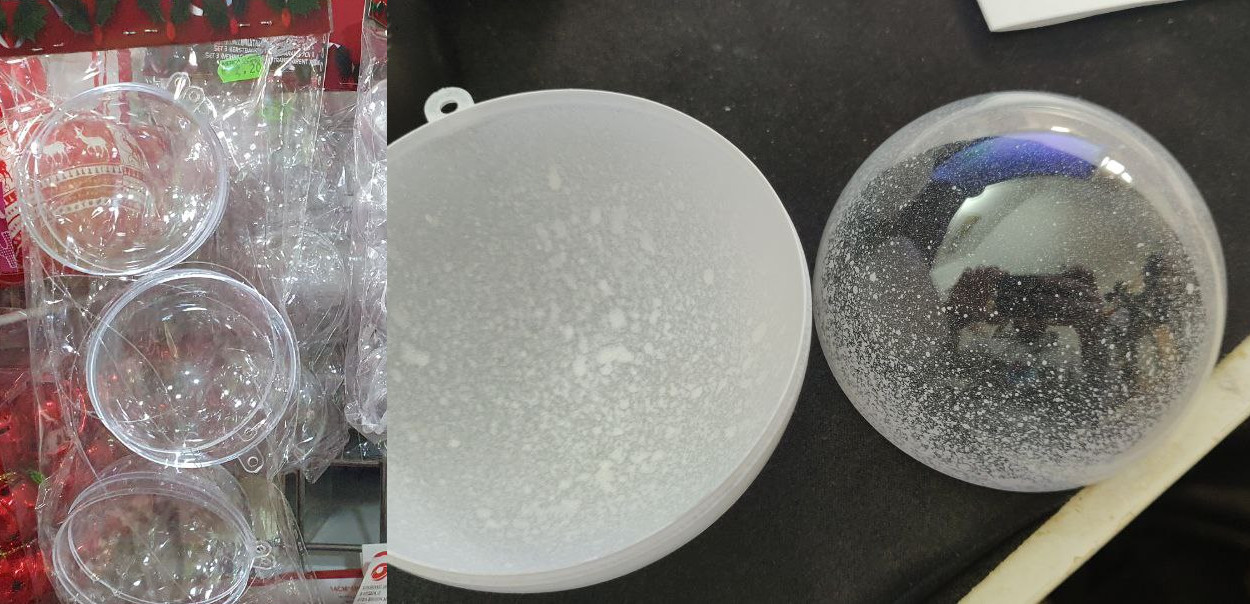
- A transparent (christmas) ball, this is the base of our special decoration
- Seeed Studio XIAO RP2040, a diminute development board which will be the brain of our creation
- Max7219 dot LED matrix module, a small LED matrix to be able to show some images and messages
- 3.3V Step up voltage boost converter, required to boost the voltage from the batteries
- 2xAAA battery holder, power!
- tiny ON/OFF switch
- 220ohm resistor
- some wires, solder, iron solder, hot glue, paint
We are going to start painting the ball, so we could work on the rest of the project while the paint dries. I painted one half (which will be used as the back) completely white with spray paint. The other (front) I pressed just a little the can nozzle to make a snow effect thanks to the splatters. Feel free to test first on some other surface first, as once painted can not be undone.
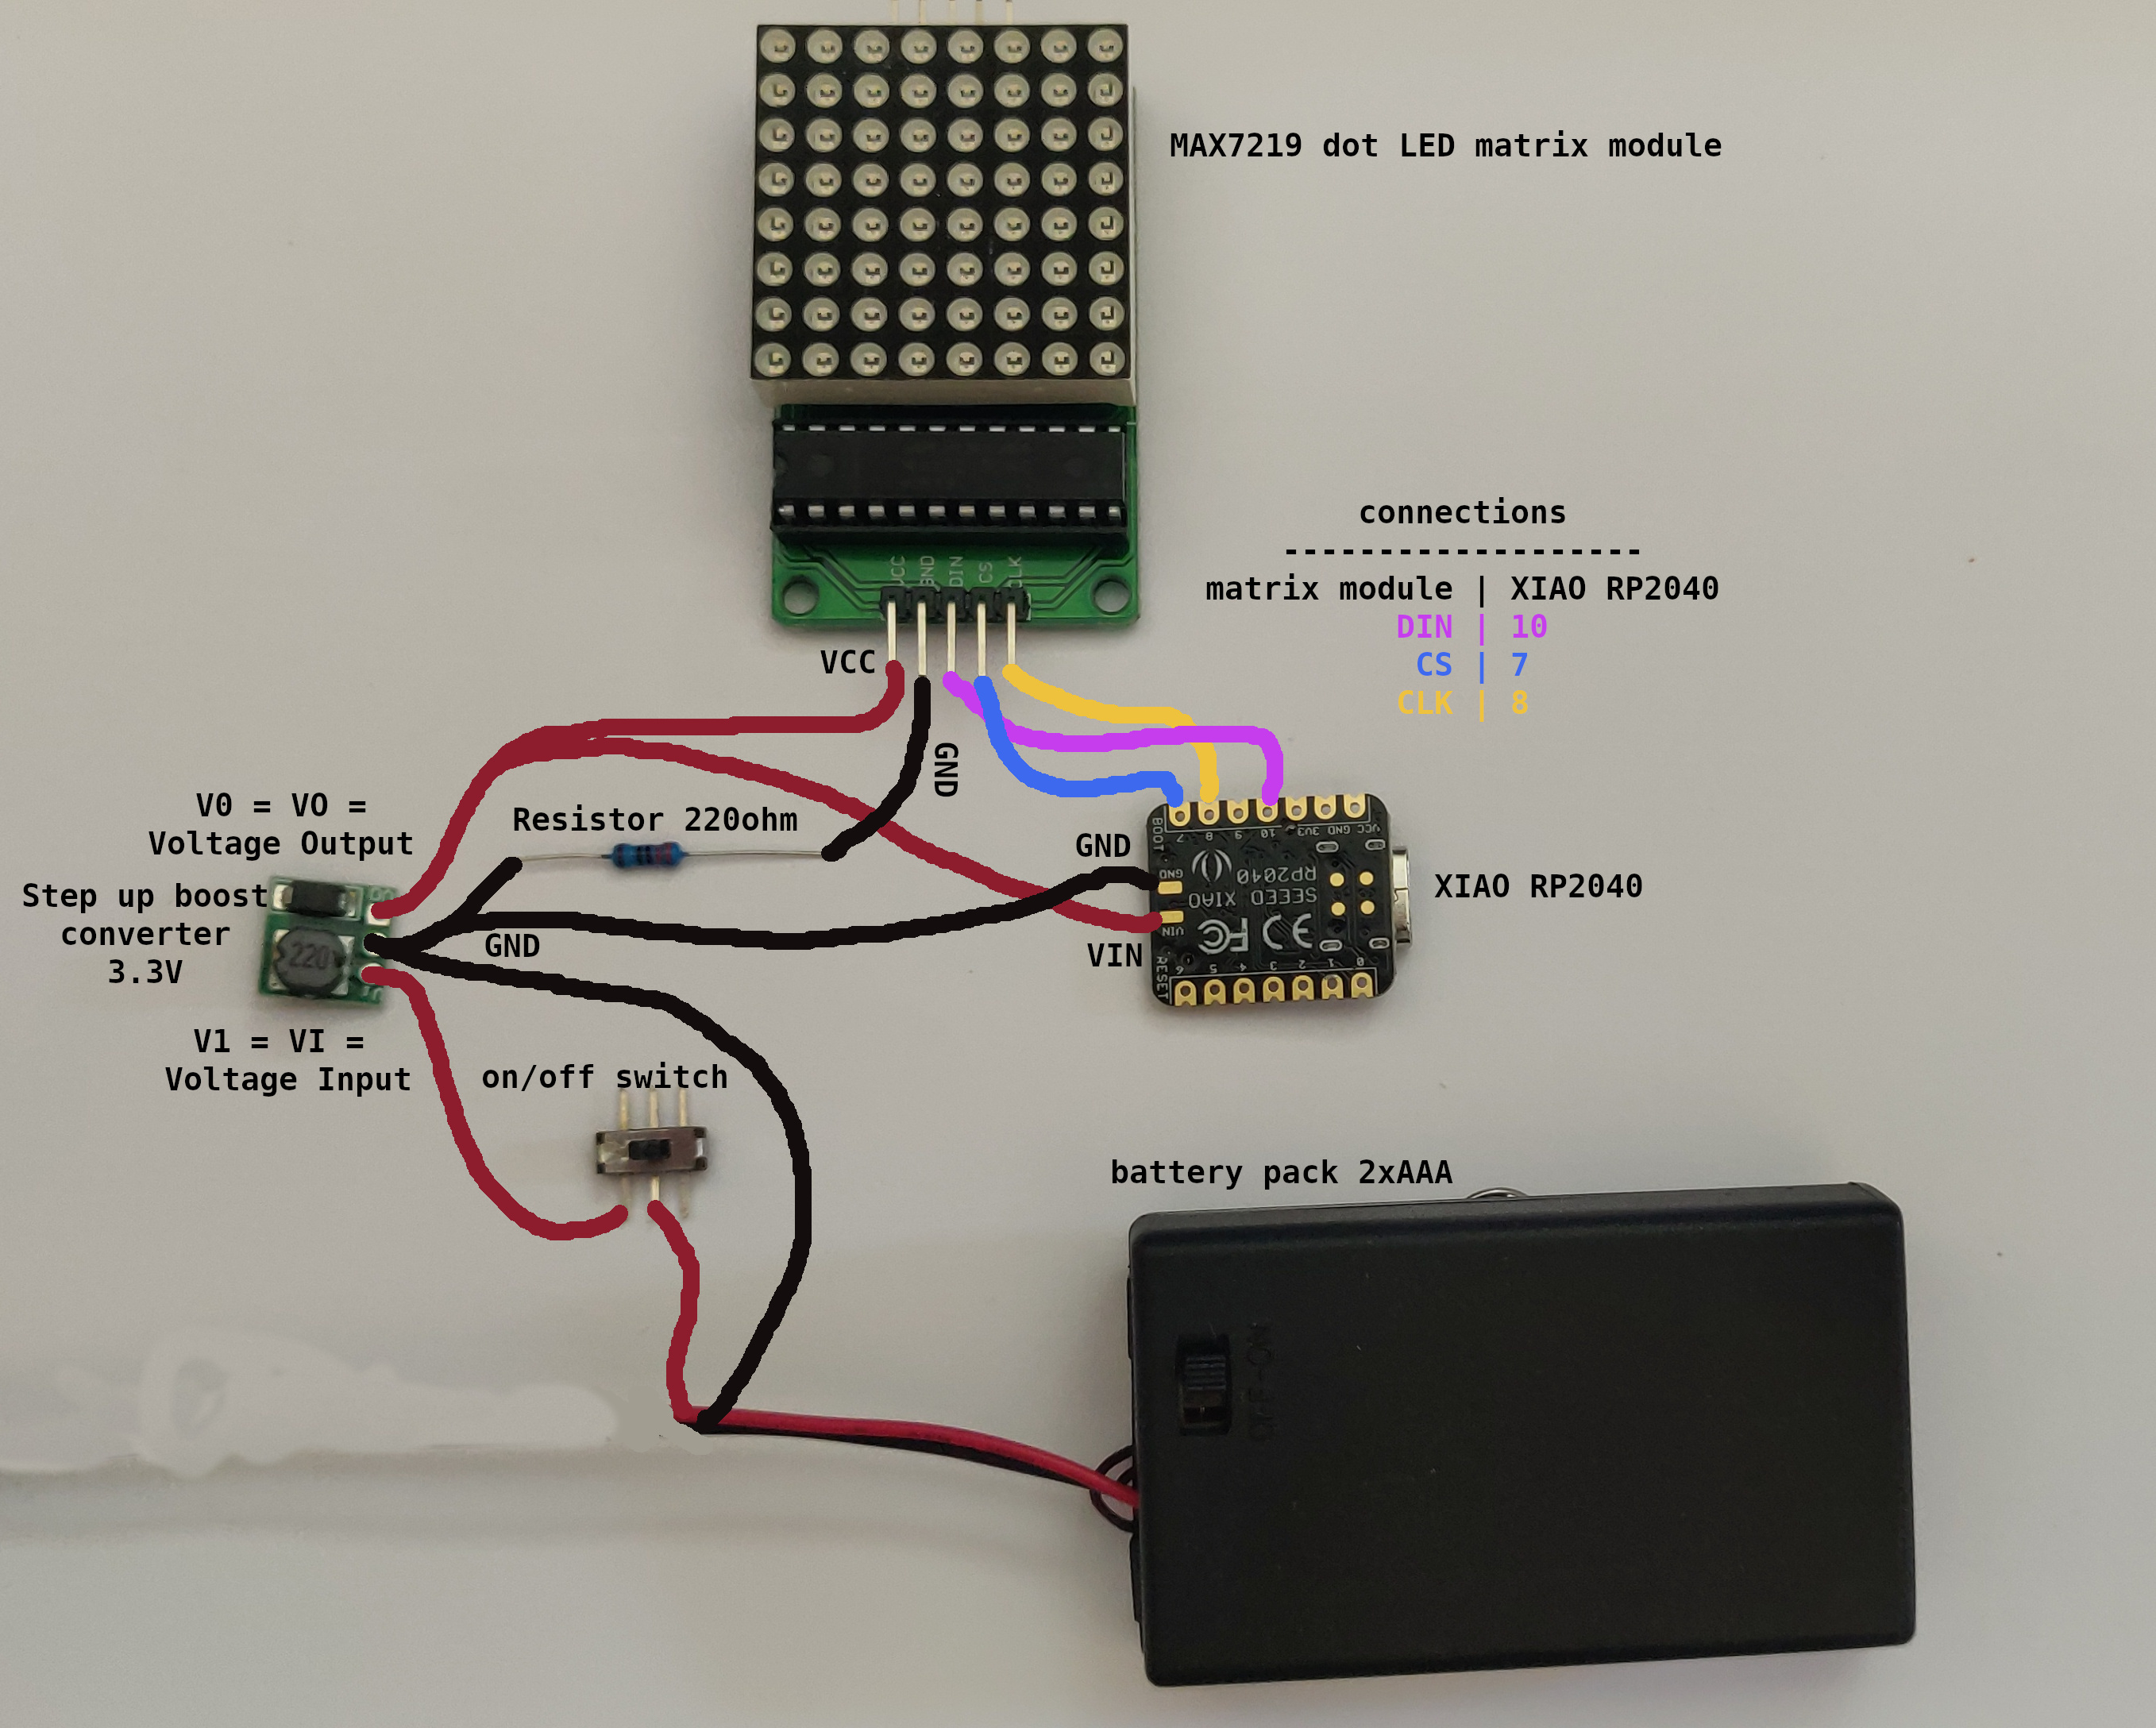
The max7219 is the big DIP chip on the module, it allos us to use few inputs (3 wires) and get lots of outputs, enough to drive 64 different LEDs at will. We’ll be using only 3 pins of the Xiao RP2040: 7, 8 and 10 and will be connected to the CS, SCK and DIN pins of the MAX7219 module respectively. Then the VCC (positive from the battery) and GND (negative) should be connected as the following schematic:
Now it’s time to write the code that will control the LED matrix and create the Christmas ball animation. TinyGo is a programming language that was specifically designed for microcontrollers like the RP2040, so it is an ideal choice for this project. It needs a special package called machine that allows our Go code to talk to the microcontroller and acts on its pins. We also need two additional packages a max7219 driver and tinyfont, a library that makes it easier to write text on displays. You could add to the project with the following command:
go get tinygo.org/x/drivers
go get tinygo.org/x/tinyfont
First, we are going to initialize all the hardware needed, the SPI connection that talk to the max7219 and the display module itself:
	// Initialize and configure the SPI connection
	err := machine.SPI0.Configure(machine.SPIConfig{
		SDO:       machine.D9, // default SDO pin
		SCK:       machine.D8, // default sck pin
		Frequency: 10000000,
	})
	if err != nil {
		println(err.Error())
	}

	// Create a new max7219 device, configure it as a 8x8 display
	matrix := max72xx.NewDevice(*machine.SPI0, machine.D7)
	disp = max8x8display.New(matrix)
	disp.Configure(max8x8display.Config{})
Once the LED matrix is set up and ready to go, it’s time to create the Christmas ball animation. This can be done using a series of loops and conditional statements that update the animation buffer and display the correct sequence of colors on the LED matrix. And since we are going to show some messages through tinyfont, lets use a font suitable for 8x8 displays, like proggy:
    for {
		n = rand.Int31n(7)
		if n == 0 {
			heart() // shows a heart icon
		} else if n == 1 {
			snowing() // shows a small snowing animation
		} else if n == 2 {
			smile() // shows a smiley icon
		} else if n == 3 {
			tree() // shows a tree icon
		} else {
			// display one of the text messages in a marquee mode
			w32, _ = tinyfont.LineWidth(&proggy.TinySZ8pt7b, msgs[n-4])
			for i := int16(8); i > int16(-w32); i-- {
				// Erase the display
				disp.ClearDisplay()
				// Write the message to the buffer (in each iteration it moves one pixel to the left)
				tinyfont.WriteLine(&disp, &proggy.TinySZ8pt7b, i, 7, msgs[n-4], white)
				// Send the buffer to the display
				disp.Display()
				// add some wait for the next iteration
				time.Sleep(125 * time.Millisecond)
			}
		}
		disp.ClearDisplay()
		disp.Display()
		// Wait 5 seconds for the next random display (message or icon/animation)
		time.Sleep(5 * time.Second)
	}
Github repository with the whole code source.
To compile and flash our newly created program into the Xiao RP2040, we need to use the following, self-explanatory, command:
tinygo flash --target=xiao-rp2040 .

Finally, test your code to make sure that the animation looks correct and runs smoothly. If everything works as expected, you can use a hot glue gun to attach the LED matrix to the inside of the Christmas ball ornament, making sure that it is securely attached and won’t fall out. And that’s it! Your TinyGo Christmas ball is now ready to hang on your tree and add some festive cheer to your holiday decorations. With a bit of creativity and some basic electronics skills, you can create your own unique and fun decorations using TinyGo and the Xiao RP2040 microcontroller. Happy holidays!